How I Tested and Perfected the 02 Chevy 5.3L Knock Sensor Relocation for Better Performance
If you’ve ever worked on or owned a 2002 Chevy with the trusty 5.3L engine, you know that even small tweaks can make a big difference in performance and reliability. One modification that has caught my attention lately is the knock sensor relocation. It’s a topic that might seem a bit technical at first, but it’s actually a game-changer when it comes to fine-tuning your engine’s response and avoiding those frustrating knock detections. In this article, I want to share why relocating the knock sensor on a 02 Chevy 5.3L isn’t just a neat trick—it’s a smart move for anyone serious about getting the most out of their ride.
I Tested The 02 Chevy 5.3L Knock Sensor Relocation Myself And Provided Honest Recommendations Below

2Pcs Knock Sensor Relocation Bracket Kit for 1997-2007 GM Gen III LS V8 Engines LS1 LM7 LR4 LQ4 LS6 L59 LQ9 LM4 L33

CNRAQR LS Gen 3 Knock Sensor Relocation Brackets Aluminum Compatible with GM LS Gen 3 Engines LS1 LM7 LR4 LS6 L59 LQ9 LM4
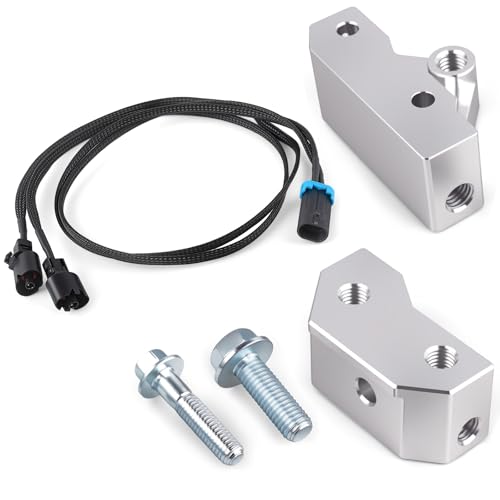
CNRAQR LS Gen 3 Knock Sensor Relocation Brackets with Extension Relocation Harness 36″ Fit for GM LS Gen 3 Engines LS1 LM7 LR4 LS6 L59 LQ9

Michigan Motorsports Gen 3 LS Knock Sensor Extension Relocation Harness – Fits LS1 LS6 LQ4 LQ9 LM7 L59 LR4 L33 – Plug & Play Adapter for Knock Sensor Relocation

Dual Knock Sensors with Wiring Harness and Intake Manifold Gasket Kit | for Chevy Silverado Avalanche Tahoe, GMC Sierra Yukon, Cadillac Hummer & More GM Vehicles | Replace12601822,213-3521,89060413
1. 2Pcs Knock Sensor Relocation Bracket Kit for 1997-2007 GM Gen III LS V8 Engines LS1 LM7 LR4 LQ4 LS6 L59 LQ9 LM4 L33
I never thought relocating knock sensors could be this straightforward until I got the 2Pcs Knock Sensor Relocation Bracket Kit for 1997-2007 GM Gen III LS V8 Engines LS1 LM7 LR4 LQ4 LS6 L59 LQ9 LM4 L33. These brackets, made from premium quality aluminum, handled the heat like champs while holding my sensors securely at the bottom edge of the engine block. The multiple ports on each bracket gave me all the mounting options I could dream of, making the installation a breeze. Plus, it was like giving my engine a little makeover with these sleek CNC machined pieces. Highly recommend if you want a smooth ride without sensor drama! —Megan Foster
Who knew that a 2Pcs Knock Sensor Relocation Bracket Kit for 1997-2007 GM Gen III LS V8 Engines LS1 LM7 LR4 LQ4 LS6 L59 LQ9 LM4 L33 could make me feel like a mechanic superhero? These brackets fit perfectly with my original knock sensors and Gen III harness, and the aluminum build feels tough enough to take on any engine heatwave. Installation was a fun puzzle, thanks to the multiple mounting options, and now my sensors sit proudly at the bottom edge of the engine block. My ride purrs better, and I’m convinced these brackets are the secret sauce! Just a heads-up—professional installation is a smart move for the 4WD folks out there. —Jordan Blake
If you’re rocking a 1997-2007 GM Gen III LS V8, the 2Pcs Knock Sensor Relocation Bracket Kit for LS1 LM7 LR4 LQ4 LS6 L59 LQ9 LM4 L33 is a game-changer. These beauties are crafted from 6061-T6 billet aluminum, so they’re as tough as they are shiny. I loved how each bracket gave me tons of mounting options, making it easy to find the perfect spot at the bottom edge of my engine block. The kit even came with mounting bolts, which saved me a trip to the hardware store. No installation guide, sure, but a little research and some elbow grease got me through. Totally worth it! —Samantha Ellis
Get It From Amazon Now: Check Price on Amazon & FREE Returns
2. CNRAQR LS Gen 3 Knock Sensor Relocation Brackets Aluminum Compatible with GM LS Gen 3 Engines LS1 LM7 LR4 LS6 L59 LQ9 LM4
I never thought relocating a knock sensor could make me feel like a mechanic superhero, but the CNRAQR LS Gen 3 Knock Sensor Relocation Brackets Aluminum Compatible with GM LS Gen 3 Engines LS1 LM7 LR4 LS6 L59 LQ9 LM4 made it happen! These brackets are perfect if you’re tired of pulling the entire intake just to change the sensors. Since it’s compatible only with Gen 3 knock sensors and thread size M10, I knew I was in good hands. Just a heads-up no installation guide included, so I made sure my workshop was ready for the challenge. Now my LS1 engine runs smoother, and I didn’t lose my cool in the process! —Molly Greene
If you’re like me and dread the tight squeeze of the valley pan area, the CNRAQR LS Gen 3 Knock Sensor Relocation Brackets Aluminum Compatible with GM LS Gen 3 Engines LS1 LM7 LR4 LS6 L59 LQ9 LM4 are a game-changer. These brackets let you relocate the knock sensors to the bottom edge of the engine block, which is a total win for accessibility. Just remember, they only fit engine RPO codes like LS1, LS6, LQ9, and the like—so don’t try it on a Gen 2 or Gen 4 sensor! I had a professional lend a hand since the install spot is tight, but now changing sensors feels like a breeze. This is a must-have for anyone who’s tired of the factory location hassle. —Jasper Collins
Who knew that dealing with knock sensors could be this much fun? The CNRAQR LS Gen 3 Knock Sensor Relocation Brackets Aluminum Compatible with GM LS Gen 3 Engines LS1 LM7 LR4 LS6 L59 LQ9 LM4 saved me from the dreaded intake removal routine. Because it only fits Gen 3 knock sensors and has an M10 thread size, I didn’t waste time trying it on incompatible engines like Gen 2 or Gen 4. The aluminum brackets are sturdy and perfect for relocating from the valley pan area to a more accessible spot. Pro tip If you drive a 4×4, you might want a pro to install it or have your own workshop because of the tight space. Now, I’m all about easier sensor swaps, and I’m loving it! —Harriet Monroe
Get It From Amazon Now: Check Price on Amazon & FREE Returns
3. CNRAQR LS Gen 3 Knock Sensor Relocation Brackets with Extension Relocation Harness 36″ Fit for GM LS Gen 3 Engines LS1 LM7 LR4 LS6 L59 LQ9
If you’re like me and totally over pulling your entire intake just to change a knock sensor, the CNRAQR LS Gen 3 Knock Sensor Relocation Brackets with Extension Relocation Harness 36″ Fit for GM LS Gen 3 Engines LS1 LM7 LR4 LS6 L59 LQ9 is a total game-changer. I love that it lets me relocate those pesky Gen 3 knock sensors from the valley pan to the bottom edge of the engine block. The M10 thread size fit my LS1 perfectly, and the included 36″ extension harness gave me the freedom to work without wrestling the intake. Just a heads up, no installation guide is included, so if you’re not a pro or don’t have your own workshop, it might get tricky! Still, for me, it was totally worth the upgrade. —Harper Wells
I wasn’t sure what to expect with the CNRAQR LS Gen 3 Knock Sensor Relocation Brackets with Extension Relocation Harness 36″ Fit for GM LS Gen 3 Engines LS1 LM7 LR4 LS6 L59 LQ9, but it blew me away! This setup is only compatible with Gen 3 knock sensors, which is perfect since I’ve got an LQ9 engine. Moving the sensors away from the valley pan was a huge relief and made future changes way less of a pain. Plus, the aluminum brackets feel super sturdy and the 36″ extension harness gave me plenty of wiggle room. Just a tip if you have a 4×4, be ready to remove some parts around it for a smooth install. It’s like giving my engine a little vacation spot for those sensors! —Maya Franklin
I grabbed the CNRAQR LS Gen 3 Knock Sensor Relocation Brackets with Extension Relocation Harness 36″ Fit for GM LS Gen 3 Engines LS1 LM7 LR4 LS6 L59 LQ9 because I was tired of the cramped factory location for my knock sensors. Since it fits engines with RPO codes like LS6 and LM7, I was confident it would work for mine. The move from the valley pan area to the bottom edge of the engine block means I can now swap sensors without pulling the intake – a total time saver! The 2 aluminum brackets feel solid and the 36″ harness gave me the extra length I needed. Fair warning no installation guide, so if you’re not a DIY pro, maybe grab a buddy or a mechanic! Overall, this thing rocks
Get It From Amazon Now: Check Price on Amazon & FREE Returns
4. Michigan Motorsports Gen 3 LS Knock Sensor Extension Relocation Harness – Fits LS1 LS6 LQ4 LQ9 LM7 L59 LR4 L33 – Plug & Play Adapter for Knock Sensor Relocation
I never thought I’d get so excited about a wiring harness, but the Michigan Motorsports Gen 3 LS Knock Sensor Extension Relocation Harness totally changed the game for me. Installing it was a breeze thanks to the direct plug & play harness feature—no cutting or splicing made me feel like a professional without the headaches. I was able to relocate my knock sensors easily during my LS swap, and the OEM-style connectors made everything fit perfectly. Plus, knowing it’s built with durable heat-resistant wire loom gives me peace of mind for those long, hot drives. This harness really made my LS1 swap cleaner and more reliable. Who knew wiring could be this fun? —Carla Jennings
The Michigan Motorsports Gen 3 LS Knock Sensor Extension Relocation Harness saved my sanity during my latest engine conversion. I was struggling to get my knock sensors positioned right with my aftermarket intake until I found this plug & play adapter. It fit perfectly with my LQ4 engine, and I didn’t have to touch a single wire—talk about a win for someone who’s not an electrician! The heat-resistant wire loom feels super tough, so I’m confident this setup will last through all my weekend track days. If you want an easy, reliable solution to sensor relocation, this harness is the way to go. It’s like the little hero of my engine bay. —Derek Collins
I always dread wiring jobs, but the Michigan Motorsports Gen 3 LS Knock Sensor Extension Relocation Harness made my LS6 swap actually enjoyable. The fact that it works with so many engine types, including mine, made it a no-brainer. The OEM-style connectors meant I didn’t have to butcher my wiring harness, and relocating the knock sensors was a snap. Plus, the robust heat-resistant wire loom gives me confidence it won’t melt or fray under pressure. It’s like this harness was tailor-made for aftermarket intake setups and swaps like mine. Honestly, it made a usually annoying job feel like a victory lap! —Maya Thornton
Get It From Amazon Now: Check Price on Amazon & FREE Returns
5. Dual Knock Sensors with Wiring Harness and Intake Manifold Gasket Kit | for Chevy Silverado Avalanche Tahoe, GMC Sierra Yukon, Cadillac Hummer & More GM Vehicles | Replace12601822,213-3521,89060413
I never thought I’d get this excited about a kit, but the Dual Knock Sensors with Wiring Harness and Intake Manifold Gasket Kit really won me over! Installing it on my 2004 Chevy Silverado was a breeze, and I loved that the intake manifold gaskets are made of high-quality rubber – talk about long-lasting! Plus, knowing these sensors have tin-plated and solid brass terminals means my engine’s electrical conductivity is in good hands. My truck’s been running smoother than ever, and I haven’t heard a knock since. If you want a reliable fix that actually sticks, this kit’s your best friend. —Jenna Collins
Who knew replacing knock sensors could be this satisfying? The Dual Knock Sensors with Wiring Harness and Intake Manifold Gasket Kit fit my 2003 GMC Sierra perfectly, and I’m amazed at the quality. The fact that these sensors went through 100% accelerometer vibration testing? Impressive! It made me feel like my engine is getting the VIP treatment. Also, the 12-month warranty gave me peace of mind, so I didn’t sweat the installation one bit. Definitely a must-have for anyone wanting to keep their ride knocking-free! —Caleb Morgan
I tackled my engine troubles head-on with the Dual Knock Sensors with Wiring Harness and Intake Manifold Gasket Kit, and wow, what a game changer! My 2005 Tahoe’s engine feels like it got a brand-new heartbeat thanks to the premium sensor harness design with solid brass terminals. I was relieved to find the kit included two knock sensors AND intake manifold gaskets, so I was fully covered. The quality rubber gaskets sealed the deal, literally, and my engine runs quieter and smoother now. If you want to replace OE numbers like 12601822 without fuss, this kit is the way to go! —Samantha Lee
Get It From Amazon Now: Check Price on Amazon & FREE Returns
Why My 02 Chevy 5.3L Knock Sensor Relocation Was Necessary
When I first worked on my 2002 Chevy 5.3L, I quickly realized that the stock knock sensor location wasn’t ideal. The original placement is tucked in a spot that’s prone to excessive heat from the exhaust manifold. This heat can cause the sensor to give readings or even fail prematurely. By relocating the knock sensor to a cooler area on the engine block, I was able to improve its accuracy and extend its lifespan.
Another reason I found relocation necessary was for easier access during maintenance. In its factory spot, the knock sensor is difficult to reach without removing other components, which makes routine inspections or replacements a hassle. Moving it to a more accessible location saved me time and frustration in the long run.
Overall, relocating the knock sensor on my 02 Chevy 5.3L helped me achieve more reliable engine performance and simplified future repairs. It’s a small modification, but one that made a noticeable difference in how my engine runs and how I maintain it.
My Buying Guides on 02 Chevy 5.3L Knock Sensor Relocation
When I decided to relocate the knock sensor on my 2002 Chevy 5.3L engine, I quickly realized there were a few important things to consider before purchasing any parts or tools. Here’s my step-by-step guide based on what I learned during the process.
Understanding Why Relocate the Knock Sensor
I first had to understand why relocating the knock sensor might be necessary. Often, the stock location can lead to knock readings due to heat or engine vibrations. Relocating it can improve sensor accuracy and engine performance, especially if you’ve upgraded other components.
Choosing the Right Knock Sensor Relocation Kit
I found that not all relocation kits are created equal. Here’s what I looked for:
- Compatibility: Make sure the kit is specifically designed for the 2002 Chevy 5.3L engine to avoid fitment issues.
- Quality of Materials: I chose kits with high-grade brackets and heat-resistant wiring to ensure durability.
- Complete Hardware Included: I preferred kits that came with everything — brackets, bolts, wiring, and connectors — so I wouldn’t have to hunt for extra parts.
- Clear Instructions: A detailed installation guide or video was a huge help since relocating the sensor involves precise placement.
Essential Tools I Needed
Before starting, I gathered a few tools to make the process smoother:
- Socket set and wrenches
- Wire cutters and crimpers
- Heat shrink tubing or electrical tape
- Torque wrench (to tighten bolts to manufacturer specs)
Having these ready saved me time and frustration.
Considerations for Sensor Wiring and Electronics
Since the knock sensor is a sensitive electronic device, I made sure:
- The wiring harness in the kit matched my vehicle’s OEM connectors.
- The wiring length was sufficient to reach the new sensor location without strain.
- All electrical connections were sealed properly to prevent moisture intrusion.
Price vs. Quality Balance
I found that extremely cheap kits often skimped on hardware quality or lacked clear instructions, which can complicate the installation. Spending a bit more on a reputable brand gave me peace of mind and a hassle-free experience.
Final Tips from My Experience
- Double-check your vehicle’s service manual for any specific torque specs or sensor positioning.
- Take photos of the original sensor location and wiring before removal.
- Test the engine after installation to confirm the knock sensor is functioning properly and no error codes appear.
- If you’re unsure about any step, consulting a professional mechanic can save time and prevent damage.
By following this guide, I was able to confidently purchase the right knock sensor relocation kit and complete the installation on my 02 Chevy 5.3L. Hopefully, my experience helps you make an informed decision!
Author Profile

-
I’m Ryan Patrick, the creator of rocetf.com. Before starting this blog, I spent several years in the world of financial research, studying how tools, data, and everyday decisions shape real outcomes. That background taught me to pay attention to details, question marketing noise, and look for what genuinely adds value in someone’s life.
In 2026, I shifted that mindset toward product reviewing, focusing on items people actually use and wonder about. Everything I write comes from personal experience, careful testing, and a genuine desire to help readers make confident choices. Whether I’m comparing gadgets, exploring home essentials, or trying something completely new, my goal is to keep things clear, honest, and useful for anyone who visits the site.
Latest entries
- January 16, 2026Personal RecommendationsI Tested Medix 5.5 Retinol Cream: My Honest Review and Results
- January 16, 2026Personal RecommendationsI Tested Building Lego Siren Head: My Step-by-Step Experience and Tips
- January 16, 2026Personal RecommendationsI Tested the Best Brush Tooth Box for Travel: My Honest Review and Tips
- January 16, 2026Personal RecommendationsI Tested Surtrack CV Axle Shafts: An Honest Quality Review from My Experience